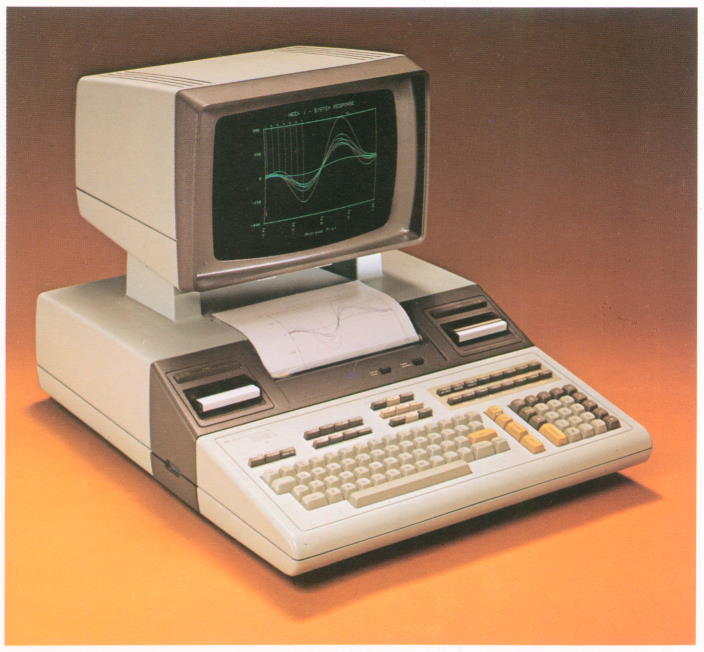
The 9845A/S
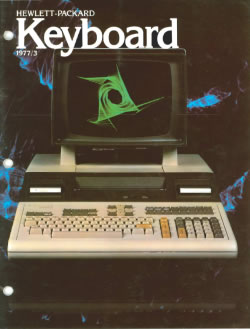
 The 9845A was the first model of the 9845 series. First announcement was in the Keyboard Magazine 77/3 and the 9845A sales brochure from 1977. The 9845A was introduced in the April 1978 issue of the HP Journal and appeared first in the HP Computer Catalog from 1978. It already contained most of the concepts, which characterized the whole series.
In order to understand the design of the 9845 series, one have to envision that in the late 70's, there were no desktop or personal computers as we use to know them. The computer scene was dominated by heavy and expensive systems like the IBM 370 or minicomputers like the HP 3000. CRT based terminals were already in use with those systems, but CRTs were not common with desktop computers. On the other side, there was an upcoming homecomputer scene, based on microprocessors like the Intel 8080, the Motorola 6800, the MOS 6502 or the Zilog Z80.
The situation from the HP point of view was very special. HP employees and many of their customers were engineers and scientists. HP was strong in the fields of measuring equipment, calculators and minicomputers. Surveys with their customers suggested that there was a need for high-end computing power at the desktop, with capabilities for complex calculations, and features like graphics, mass storage and printers. Those engineers and scientists were close to technology, but no computer specialists, and had only limited system knowledge about computers.Consequently, the system should be easy to use and at the same time as flexible and powerful as possible. So HP concentrated their knowledge from both the computer and the calculator engineering, and designed a highly integrated desktop system, and one of the very first workstations was born. The HP 9845A outclassed any home computer, and provided minicomputer power on desktop level.
Some design decisions, like using a built-in CRT, splitting the processing power between a language processor and an I/O processor, hardware support for floating point calculations, the use of function keys and a numeric keypad, or providing an I/O bus with extension modules for connecting peripherals, were exemplary for many subsequent systems.
The system was sold in two configurations:
- The 9845A, a basic configuration with 16K Bytes LPU R/W Memory, one tape cartridge drive and no internal printer, and
- the 9845S, an expanded version with two internal cartridge drives, a built-in thermal line printer, and 64K of LPU R/W memory, and graphics support.
The 9845A was priced at $11,500, whereas the 9845S was priced at $20,000. The number of 9845A units sold is unknown, however the vast majority of System 45 computers sold were 9845B models.
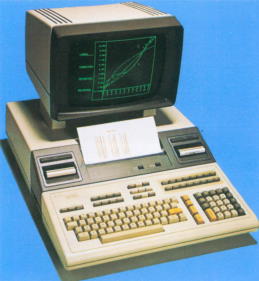 Some of the innovations of the 9845A were covered by the US patent No. 4180854 from 1979. Those innovations include the new CRT display, modifications of the 9825 hybrid processor, the memory address extension, the enhanced HP BASIC and the internal printer.
The 9845A was replaced by the 9845B in 1979.
In contrast to the 9845B, all of the 9845A OS was held completely in plugable ROM modules. Those modules occupied four slots in each ROM drawer and left only four slots for option ROMs, one of the reasons why they later moved on the RAM/ROM assemblies. The 9845A ROM modules can't be used with the 9845B ROM drawers and vice versa.
Language processor and peripheral processor were both mounted on one single assembly, sharing one memory address extension and one dual port memory controller. In the 9845B, each processor was placed on its own assembly, together with its own memory controller and memory address extension. The 9845A memory address extension was designed for four memory blocks of 64 KBytes each, so the total memory space for both LPU and PPU was limited to 256 KBytes:
- block 0 was reserved for LPU R/W memory,
- block 1 for PPU system ROM, some I/O R/W memory, screen buffer and PPU option ROMs,
- block 2 for LPU option ROMs and
- block 3 for LPU system ROM.
The memory address extension of the later 9845B was designed for up to 64 memory blocks with an extended address space of up to 4 MBytes.
There were two different 9845A R/W memory assemblies, one with 8 KBytes DRAM (used with the PPU) and one with 16 KBytes DRAM (up to four of those boards could be installed for the LPU). The later 9845B featured combined RAM/ROM boards with 32 KBytes DRAM for the PPU and 64 KBytes DRAM for the LPU, as well as R/W memory extension boards of 128 KBytes and 512 KBytes.
The 9845A motherboard was slightly different than that of the 9845B. Keyboard, PSU, tape cartridge drives, the internal thermal printer and the CRT monitor were the same as those of the 9845B.
Most BASIC commands of the 9845B already work on the 9845A. Exceptions are CAT TO, ON KBD, OFF KBD, and KBD$. Therefore, BASIC programs are generally interchangeable, sometimes with some minor modifications. Unfortunately, the STORE format was changed between the 9845A and the 9845B, so programs first have to be SAVE'd on a 9845A and then loaded with GET at a 9845B. Files of type DATA and BDAT could be interchanged, all other file types not.
In general, binary routines developed for a 9845A will not run on a 9845B and vice versa. This is particulary caused by the different memory address extension and different OS routine jump vectors.
Technical Specifications
|
|
Close up
 |
The 9845A workstation had been designed as an integrated desktop solution with keyboard, CRT monitor, thermal printer and two cartridge tape drives in one single system. The whole design, although highly integrated, still is quite serviceable. Every component can be accessed with only a few steps. |
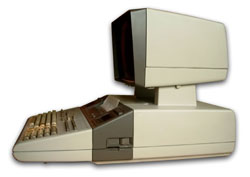 |
The main housing is built completely from molded plastics with internal metal coating for proper EMI shielding. The power switch for the whole system and the adjustments for the CRT monitor are both located on the right side of the system. |
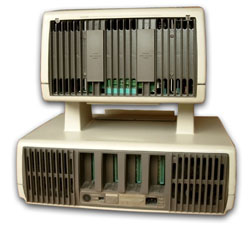 |
Due to the integrated design only a few cables are needed. All connections have been positioned at the back of the system, so no cables are visible to the user and everything looks quite tidy. The 9845A provides a connector to AC power and four I/O connectors for expansions like interface modules. Because of the high number of components and the resulting high power consumption, a cooling flow of air is guided from the front through the whole system and exhausted by two fans mounted in the back of the system. The thermal design made it possible to pack all the boards tightly together. The standard monitor is passively cooled by convection. |
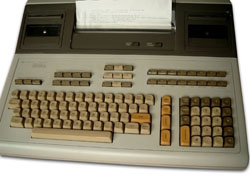 |
The 9845A keyboard includes a standard Selectric-type alphanumeric key block, a separated numeric key block, a number of special function keys which can be assigned by the user to any key sequence macros, and several special keys mainly for editing and system control. All keys have a high-quality mechanism suitable for fast and comfortable typing. Keycaps are the same as for the 9825 and 9835, however the switch mechanism had been enhanced. I do not own a single 9845 keyboard with non-working keys. |
 |
The 9845 could either be ordered as 9845A base system with single cartridge tape drive and without printer and then upgraded as needed, or as complete system with two cartridge tape drives an thermal printer already installed, which then was called 9845S. So, many 9845A, which have been upgraded with a second tape and the printer, are actually 9845S. |
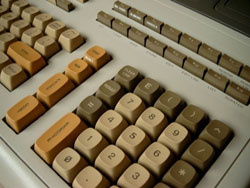 |
In the middle between the alphanumeric key block and the numeric key block is a row of frequently used system control keys. While the normal PC's Enter key combines several functions like "input done/continue", "store" or "execute", the 9845A has one key for each of these functions. Also there are individual keys for running or pausing a program. The special funtion keys above can be either used for functions defined by a program, or can be user assigned with arbitrary key sequence macros.
|
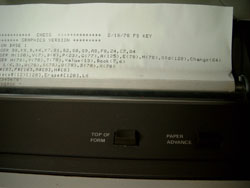 |
The 9845A could be ordered with a built-in, 80 character wide thermal printer. The printer can be fed with any standard fax thermal paper on paper roll. The printer is pretty fast (up to eight pages per minute), and can also print 560 pixel wide dot matrix graphics such as screen dumps. If the paper has page index holes (for positioning at perforation), the 9845 recognizes them. Two keys can be used to advance paper either by one single line or up to the start of the next page. After finishing printing, the paper can be simply cut off. |
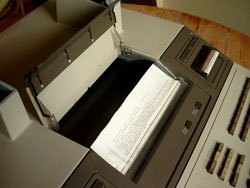 |
The paper tray holds a single paper roll. The thermal paper is guided by transport rollers. There is a lid over the paper tray, which can be detached (which unfortunately results in many system with missing lids today). |
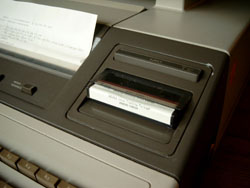 |
The cartridge tape system had been quite sophisticated for the time. It was extremely fast (at least compared to compact cassette solutions) and (30 years ago) also quite reliable. The cartridge tapes have almost the same form factor as the more recent QIC 40/80 cartridges, and were much more handy than the 5.25" or 8" floppies of the time. The 9845A could use a special command to save the full machine state on tape (somewhat like the suspend-to-disk function of modern systems), so that work could be continued even after powering the system off and on again. |
 |
The whole system could be switched on with a single power switch located at the right side of the system. When switched off, the 9845 was totally diskonnected from the AC power source, and therefore did not consume any stand-by power. However the line filter still is connected to the AC line even when the power switch is in the off position. Once switched on, the 9845A needed only a few seconds to become ready for input, since the whole operating system was in ROM and as such immediately available. |
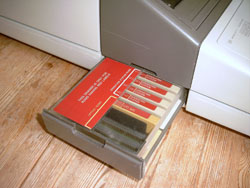 |
The whole operating system firmware was kept for the 9845A in ROM modules, which could be easily installed and exchanged by the user in one of the two ROM drawers. Each of the two CPUs of the 9845A had its own ROM drawer. The ROM modules are fairly reliable, so one of the most frequent reasons for 9845B systems to hang up during boot - the system ROM failure - normally does not apply to the 9845A. |
 |
The slots for the expansion ROM modules in the ROM drawers were limited because half of the slots were occupied by the system firmware. This changed with the 9845B models, where the operating system firmware moved to the system RAM boards. |
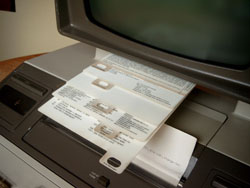 |
9845 BASIC was quite capable, and it was almost impossible to remember all the keywords. So the 9845 provided help cards with quick information overview about all available commands. Also there were listings for all error messages and the most important operations needed to work with a 9845 system (also including the current system configuration). All cards were installed as pull-out cards below the CRT monitor and could easily be accessed each with its own tab. When adding an option ROM for expanding the system firmware, sometimes there were stickers included which could be placed on one of the spare cards. |
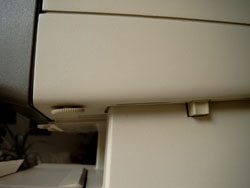 |
The brightness of the CRT monitor display can be adjusted with a small knob on the left below the CRT monitor. If you can't see output on the CRT, the first action should be to turn this control. You also can see the latch for the CRT monitor. There is one latch on each of the legs on which the monitor is mounted. Push in both latches and you can lift up the whole CRT monitor assembly. |
 |
Compared to other systems of the time the 9845 had a very small number of ports. There is almost nothing built-in, no standard parallel or serial port, no joystick port, no external sound. The four connectors in the back of the system each represent a connection to the 9845 I/O bus, and are best comparable to the ISA or PCI expansion slots of common PCs. In order to connect a device (or a network) to it, the appropriate expansion module or "interface" has to be plugged into one of those slots. There were interfaces for almost everything available, including a self-contained real time clock with battery back-up. If four slots are not enough, there is a special bus extender, which provides seven I/O slots in a separate break-out box. |
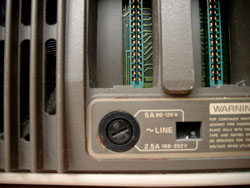 |
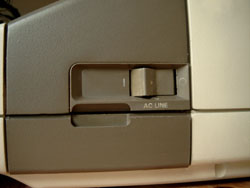
The 9845 could be operated with both 110V/60Hz and 220V/50Hz AC. However it did not have a voltage auto-detect like modern switching PSU have, so it is essential to check and configure the 9845 to the right setting before connecting it to a power line. If nothing happens when switching on a 9845 (even fans not spinning) probably the fuse has to be exchanged. But consider that there might be a reason why the fuse has blown before, which can indicated it is not safe to power on the system because the reason (e.g. a short circuit) is still there. |
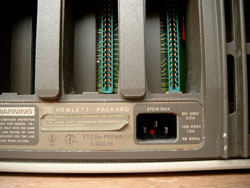 |
The 9845 uses a standard power cord to connect to the AC power source. Power consumption is 275 Watts maximum. The power jack is part of a line filter module which is placed directly behind the rear cover. |
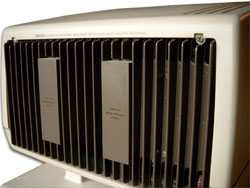 |
Detail view of the 9845 CRT standard monitor design. The monitor is the same for the 9845A as for the 9845B model 100. It is cooled passively by convection and holds all logic needed for character generation and display. The most heat producing components are directly mounted to the back cover with its cooling rips. The standard CRT monitor does not have its own power supply, so all power is derived from the mainframe through the two monitor legs. The upper two screws have to be removed to open the CRT monitor housing. |
 |
Once the two screws are removed, the upper half of the CRT housing can be moved towards the back. Of course the whole system should be diskonnected from power before opening the CRT montor. Also note that there are high (lethal) voltages in there for a certain period even after diskonnecting from power source. The graphics option for the 9845 is just another pair of boards which have to be installed in the CRT monitor, plus one ROM module for the firmware extension. The graphics option boards are the same for the 9845A and the 9845B model 100, however the option ROM modules, which have to be installed in one of the ROM drawers, differ. |
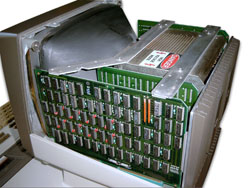 |
The large board on the right side of the monitor holds the graphics memory, and the board behind is the graphics scanner board. Together with a graphics option ROM, both boards build the graphics option for a 560 by 455 monochrome bit mapped graphics. Note that the graphics scanner board plugs into the system I/O bus, which is made available through the right monitor leg. |
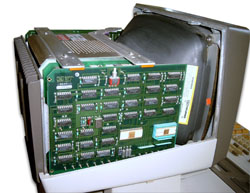 |
The CRT monitor is standard equipped with a digital display logic board (visible in the front) and an analog CRT circuit board (behind in second row). The digital display logic board gets the character and attribute data streamed digitally through the left monitor leg from the mainframe's alpha logic. This character and atribute information is then mapped to a character ROM on the digital display logic board, where then the proper scanline information is generated by applying the attribute information (standard, blinking, underline, inverse) to the character data and passed to the analog logic for display on the CRT. Note the self test switch on the digital display logic board. When pressed, the CRT alpha raster should be inverted. There are several adjustment controls for the CRT raster on the analog CRT circuit board. |
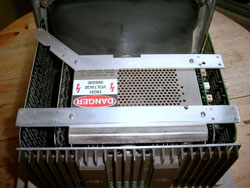 |
All circuit boards are secured with aluminium bars. In the center of the monitor there is a dedicated metal cage for the CRT beam control including the high voltage section. For accessing the cage or one of the logic boards, the four screws holding the metal bars and the top cover of the CRT cage have to be removed. |
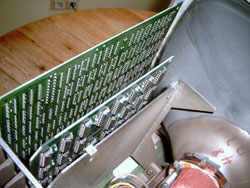 |
Here you can have a look from inside to the graphics memory board, the graphics scanner and the CRT (left to right). |
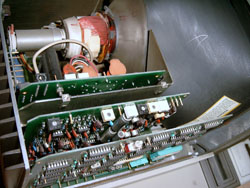 |
Look from the above view to the CRT, the high voltage board, the analog CRT circuit board, and the digital display logic board (left to right). The analog adjustment controls are labeled RT LIN and LT LIN (for raster alignment), A WIDE and G WIDE (for alpha and graphics raster size) and A HEIGHT and G HEIGHT (for alpha and graphics height control). |
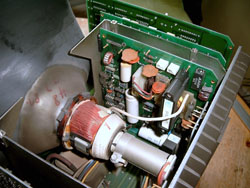 |
The two adujstment controls on the high voltage board are for focus and intensity control. |
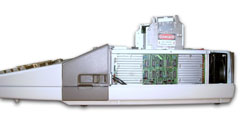 |
The system without the CRT monitor is also called the "mainframe". Here the 9845A mainframe is shown with the top cover removed. You can see the board with the two CPUs (LPU and PPU) below their heat sinks, and the fan on the right which draws the air over the CPUs out of the system. |
 |
Top view of the right (CPU & printer) board cage. From left to right: processor assembly, memory address extension, printer control logic and CRT graphics interconnect. In the middle is the PSU with its aluminium plate, framed by the CRT monitor legs, the I/O backplane and the printer. All mainframe boards plug into edge connector slots in mainboard, which is mounted on the system's floor. |
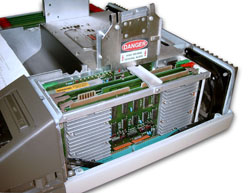 |
Same view from another angle. Note that the boards in the CPU/printer cage are secured with a small aluminium bar. |
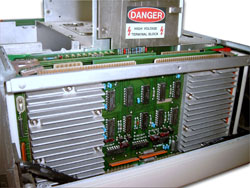 |
Close-up of the processor assembly. |
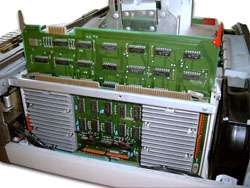 |
Note that each board is equipped with a pair of levers for extracting the boards from their slots. Also those levers denote with a color code on the PCB guidance which board has to be placed in which slot. Although extracting gets easier with those levers, it is not recommended to use them, since they have lost their stability during the years and quickly brake off. Better try to move the boards by grabbing the board's PCB. The board half extracted from the cage is the memory address extension board, which allows the 9845A processors to address more than one 64 kByte memory block. |
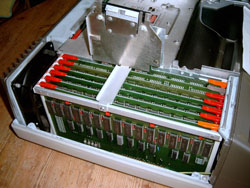 |
Top view of the left (memory) board cage. From left to right: PPU R/W memory (8 kBytes), four boards with LPU R/W memory (16 kBytes each), dual port memory controller, and alpha control assembly which goes up through the left monitor leg. |
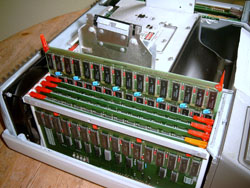 |
Same view with one of the LPU 16 kByte memory assemblies drawn out of the cage. Note that this configuration holds the maximum amount of memory and therefore is fully equipped. |
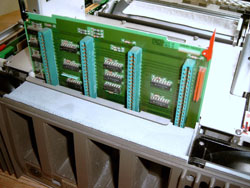 |
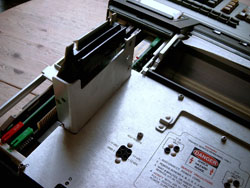
The backplane (here almost drawn outside the mainframe) holds the four I/O connectors, which are implemented as edge connectors. The backplane connects to the system I/O bus (the IOD bus) via another edge connector on the mainboard below. |
 |
The PSU uses a relevant amount of the volume space in the mainframe. The 9845A PSU is identical to that of the 9845B model 100 (or, more precise, it has the same external specification), so the 9845A and 9845B model 100 PSUs are interchangeable. Note the bracket for extracting the whole PSU assembly, and the test points for voltage checks. |
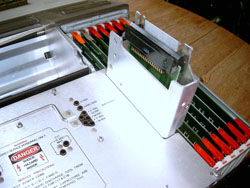 |
View to the other test connectors on the PSU plate. There are also connectors for diskharging the large capacitors, HP's service personnel used a special diskharger before moving the PSU out of the system. Note the screws marked with capital letters, they have be removed before the PSU can be lifted out of its bay. Do not remove the inner screws, they retain the aluminium plate to the PSU below. |
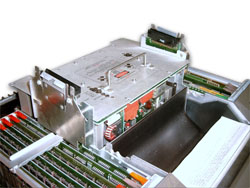 |
Here the PSU is lifted vertically half out of its bay. The PSU actually is a package of four individual PCBs, connected with a fifth motherboard and an aluminium plate. |
 |
View of the empty PSU bay. Note the edge connectors on the ground, they are mounted on the mainboard below. Also note the binder around the right edge connector socket, I used it for giving the connector a bit more stability (it had been damaged during transportation since the sender did not remove the PSU before shipping). The MATE-N-LOK connector directly comes from the power switch and supplies 2 x 115V AC input for the PSU. |
 |
The PSU is a wonder of electronics itself. It consists of a motherboard which connects a chopper circuit with a regulator board and two voltage groups generating ±18V, ±12V, +7V, +5V and ±17V, +13V for the mainframe and the CRT monitor. Note the MATE-N-LOK connector plugging into the 115V input from the PSU bay, and the yellowish epoxy capacitors near by and on the top, which has to be replaced on every PSU before connecting it to a power source. |
 |
Same assembly from a different angle. Note the edge connectors plugging into the mainboards edge connector sockets, the heat sinks for the switching/regulating transistors and the rectifiers, and the two large leveling capacitors (which keep their >115V charge for a relatively long period even after the system has been switched off). |
Cover of the German CHIP Magazine (very first Issue from
September/October 1978,
Title Story is "The computer,
the unknown being", Screen says "Wo are you?")
Design by Dieter Ziegenfeuter, Munich
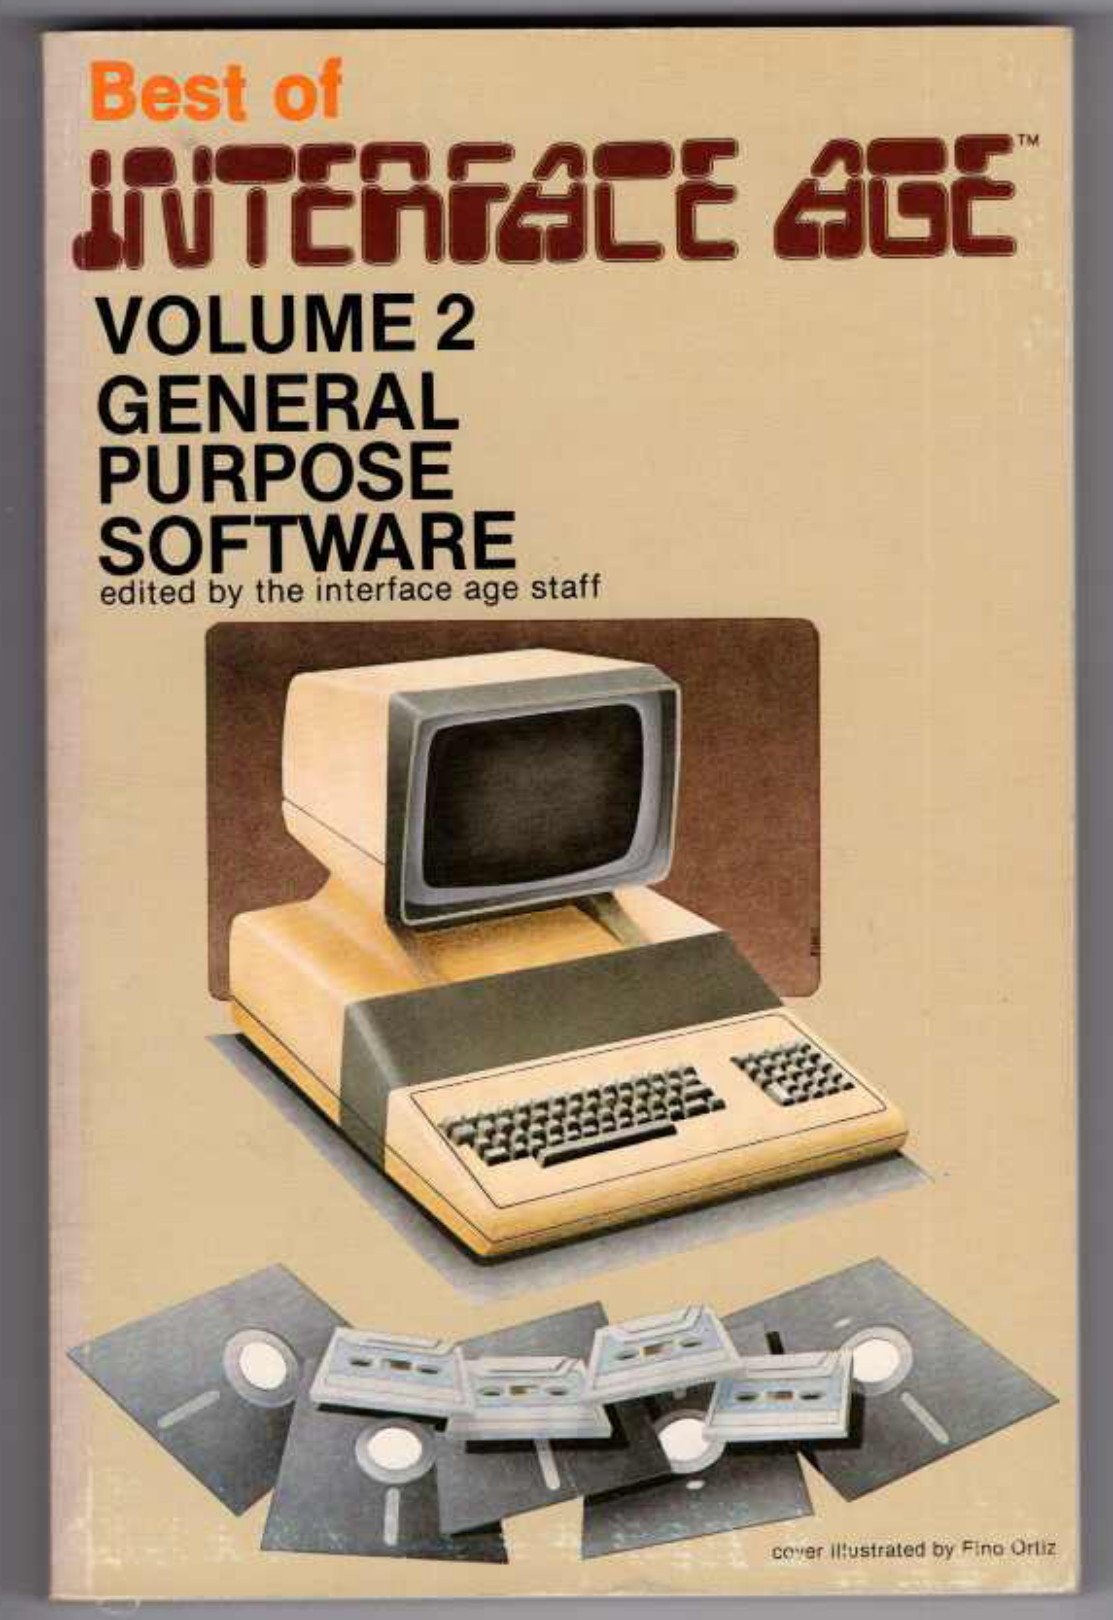
Cover of Best of Interface Age Vol. 2
More Information
Basic sales information about the 9845A is contained in the 9845A brochure from 1977. As background for the 9845A it is recommended to examine the April 1978 issue of the HP Journal (see here for download). Additional details for the system and the whole concept may be found in an article written by the developers of the 9845A in a compendium about computer structures and published at McGraw-Hill (look here for download) and, of course, in the patent mentioned above (look here for download).
There is no dedicated service or CE handbook for the 9845A, at least as far as I know. Although the differences between the 9845A and the 9845B are not that significant, and although there already was a test ROM for the 9845A, I wonder how the service support for those systems was organized between 1978 and 1980.
