9845 Mouse Project
Why and How
At the design time of the HP 9845, human interaction already was an important issue for computer systems, however a computer mouse was not part of the concept. Instead, several other pointer devices were offered, like digitizers, light pens or graphic tablets. Even the arrow keys could be used to position a cursor, and some plotters could be used in a reverse mode to feed their position back into the host system. But no mouse was available. Not for the HP 9845 and not for any other system, except the famous Xerox Alto, which had been the grandfather prototype platform for many of the modern human engineering concepts, including a window based graphical user interface or - using a computer mouse as pointing device.
Ok, the HP 9845 didn't have a mouse support. But there were enough other means for positioning and pointing. So, where is the problem?
- The HP 9111A graphics tablet is rare, the light pen is very rare, and the digitizer is super rare. If you like to use the interactive graphics features of the 9845, you'll in most cases have to be satisfied with the arrow keys.
- Theoretically, it could be possible to connect a standard serial mouse via a serial interface to the 9845. And just as it is with climbing high mountains, if it can be done, this is reason enough to do it.
So I tried and I was surprised how good it works.
A Brief History of Computer Mice
As far as we know today, the computer mouse as a pointing device goes back to the years 1963/1964, when Douglas C. Engelbart and his collegue William English worked with their team at the Stanford Research Institute (SRI) on different pointing devices for computer systems. First presentation to the public was at the autumn summit of the American Federation of Information Processing Societies (AFIPS). Later in 1970 Engelbart received patent US3541541 for an "X-Y Position Indicator for a Display System". Doug Engelbart's construction was based on two wheels, which were mounted in a 90° angle. William English changed over to the Xerox Palo Alto Research Center (PARC), where the ball mouse was developed with its first use in the Xerox Alto in 1973.
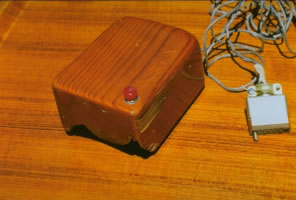
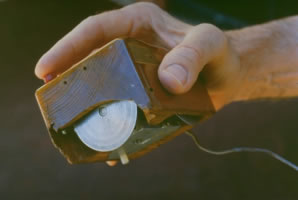
Doug Engelbarts' Original Mouse Prototype
First commercial applications were with the Xerox Star in 1981 and the Apple Lisa in 1983, however both with limited commercial success. This changed completely with the Apple Macintosh in 1984, where the concepts previously prooved with the Lisa were implemented in a convenient, coherent and - most important - affordable manner.
I personally was immediately convinced when playing around in 1984 with an early Macintosh, that this concept would conquer the mainstream market. The 80's proceeded with the ball mouse as standard, low-cost pointing device for most subsequent systems. The IBM PC, when launched in 1981, actually didn't yet support mice pointers (in fact, the graphical user interface was completely missing). The PS/2 series was the first officially offering a mouse device for the PC, the PS/2 mouse, in 1987. In the end of the 90's, the optical mouse started to displace the ball mouse, offering a more accurate and less dirt sensitive tracking mechanism.
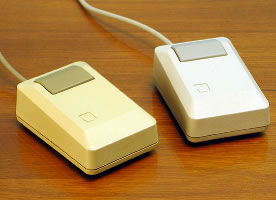
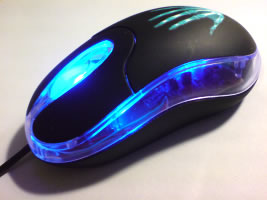
Original Macintosh Mouse and Modern Optical Mouse
The first mice did have ony one button, as did the original prototype of Doug Engelbart and the first Lisa and Macintosh mice. The first Microsoft and PS/2 mice already provided two buttons, and Logitech presented the first sucessfully selled three-button mouse in 1985 (perfect example of making business by just adding a simple but useful feature). Commercial workstations generally used three-button mice, especially when operated with X Window based GUIs.
Operating a Serial Mouse with an HP9845
Prerequisites
For using the mouse as a pointer device with an HP9845, you need
- a 98036A RS-232C serial interface (either standard with DTE connector or option 001 with DCE connector),
- an RS-232C serial Microsoft compatible mouse,
- if required, an 9-to-25-pin adaptor for connecting the mouse to the 98036A serial interface, plus
- one of the Assembly Language option ROMs (either the Assembly Execution or the Assembly Execution & Development ROM), I/O Option ROMs recommended.
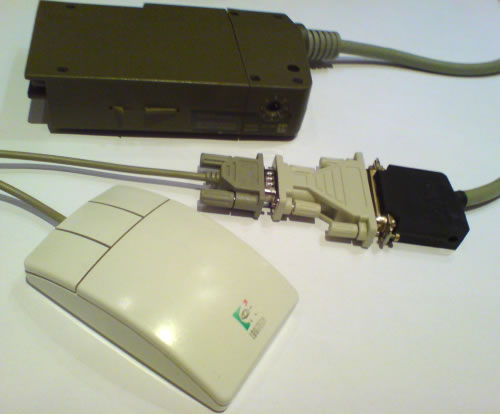
98036A opt. 001 Serial Interface, Standard 9-pin-to-25-pin
Adaptor and Logitech 3-button Mouse
Because a serial mouse device operates as a DCE (data communication equipment), the normal connection of a serial mouse device is via a 98036A opt. 001 interface. If the mouse has a 9-pin SUB-D connector, you can use a standard 9-pin-to-25-pin adaptor with the following wiring:
| 9-pin Mouse (female) |
25-pin 98036A opt. 001 (male) |
Signal |
| 1 | 8 | DCD (Data Carrier Detect) |
| 2 | 3 | RxD (Receive Data) |
| 3 | 2 | TxD (Transmit Data) |
| 4 | 20 | DTR (Data Terminal Ready) |
| 5 | 7 | GND (Signal Ground) |
| 6 | 6 | DSR (Data Set Ready) |
| 7 | 4 | RTS (Request to Send) |
| 8 | 5 | CTS (Clear to Send) |
| n/c | n/c | RI (Ring Indicator) |
| Shield | Shield | Shield |
If using a 98036A standard serial interface (which usually connects to DTEs), the 9-to-25-pin adaptor must have a null-modem wiring:
| 9-pin Mouse (female) |
25-pin 98036A Standard (female) | Signal | |
| DCD (Data Carrier Detect) | 1 | 8 | DCD (Data Carrier Detect) |
| RxD (Receive Data) | 2 | 2 | TxD (Transmit Data) |
| TxD (Transmit Data) | 3 | 3 | RxD (Receive Data) |
| DTR (Data Terminal Ready) | 4 | 6 | DSR (Data Set Ready) |
| GND (Signal Ground) | 5 | 7 | GND (Signal Ground) |
| DSR (Data Set Ready) | 6 | 20 | DTR (Data Terminal Ready) |
| RTS (Request to Send) | 7 | 5 | CTS (Clear to Send) |
| CTS (Clear to Send) | 8 | 4 | RTS (Request to Send) |
| RI (Ring Indicator) | n/c | n/c | RI (Ring Indicator) |
| Shield | Shield | Shield | Shield |
Preparations
The 98036A interface has to be configured to a data rate of 1,200 baud, there is a second small switch at the side of the interface (NOT the select code switch on the upper side of the interface!) which has to be set manually to 5 (=1,200 baud). The select code actually doesn't matter as long as no other interface uses the same select code, however it is recommended to use select code 10 for the 98036A standard interface and select code 11 for the 98036A opt. 001 interface.
The Microsoft Serial Mouse Protocol
I've chosen the Microsoft serial mouse for a test since most serial mice do support the communication protocol used by this standard type of computer mouse. Note that the PS/2 mouse works slightly different and is neither compatible to RS-232C nor to the serial mouse protocol.
The original Microsoft mouse has two buttons and two axis. In contrast to e.g. a graphics tablet, not the absolute position is transmitted to the host, but the relative movement. For communication, an RS-232C connection is used with 1,200 baud, no parity, 7 data bits and one stop bit (1200-N-7-1). The power supply is done via the RTS and DTR lines, so both lines must be permanently set positive by the host for proper operation.
Data is sent to the host with each mouse event, which in turn is triggered either by pressing or releasing a button or by mouse movement. Each event generates a package of three bytes, with the following meaning:
Bit7 Bit6 Bit5 Bit4 Bit3 Bit2 Bit1 Bit0
+----+----+----+----+----+----+----+----+
Byte 1: | X | 1 | LB | RB | Y7 | Y6 | X7 | X6 |
+----+----+----+----+----+----+----+----+
Byte 2: | X | 0 | X5 | X4 | X3 | X2 | X1 | X0 |
+----+----+----+----+----+----+----+----+
Byte 3: | X | 0 | Y5 | Y4 | Y3 | Y2 | Y1 | Y0 |
+----+----+----+----+----+----+----+----+
With bit 7 of each byte as 'don't care'-bit, bit 6 as sync bit for indicating a new byte sequence, LB as the left button state with LB=0 if released and LB=1 if pressed, RB as the right button state, Y7..Y0 as signed vertical motion and X7..X0 as signed horizontal motion (both in 2's complement notation if negative). Both motion values are in the range of -128 to +127.
The Mouse Driver Implementation
A good mouse driver should
- capture all mouse data,
- work in the background without disturbing the running user program,
- control the hardware cursor directly without the user program involved,
- activate appropriate handler routines in the user program as required,
- be capable to be enabled and disabled as needed,
- support both text and graphics mode.
The normal use would be in a BASIC program, however for proper operation the mouse driver itself must be programmed in assembly language, and therefore requires an Assembly Execution or Assembly Execution and Development option ROM installed. Actually, the mouse driver is a perfect example for how the interrupt I/O system of the HP9845 can be used.
First, there has to be a routine which registers another routine, the interrupt service routine (ISR), as system level handler for all interrupts generated from serial input. The routine also has to do further initializations, like setting up the proper communication parameters for the serial line and enabling the interface. Once registered, each byte of serial input data generates a call to the interrupt service routine, which then takes the byte from the interface, performs the appropriate operations on this byte, and finally tells the interface to accept the next byte from the mouse device.
When all three bytes are complete, the interrupt service routine checks whether one of the conditions are met which had been previously requested from the BASIC user program (like button up or button down events), issues the events to the running BASIC program, and updates the cursor position.
Finally, two other routines are required: one for setting mouse parameters like the type of events the BASIC program is interested in or the type of graphical cursor which should be displayed, and another routine for terminating (de-installing) the mouse driver.
For the notification from the interface to the interrupt service routine, system-level interrupts are used. For the communication from the ISR to the BASIC program, BASIC level interrupts are used. Both have a certain relation in that every BASIC level interrupt is the result of a change in the input data, which again is triggered by a system-level interrupt. However, the BASIC program defines which type of change it wants to be notified for.
I wrote a sample driver (simply called "Mousedriver") which demonstrates how to implement and use interrupt-driven system-level I/O and which uses the following assembly language routines to perform the tasks decribed above:
Mouse_on(<select_code>)
Installs the driver for the serial interface with select code <select_code>, which is usually either 10 or 11 for serial interfaces.
Mouse_set(<event_mask>, <cursor_type>, <cursor_color>, <vsync>)
Configures which events should be reported to the user program, and which cursor type should be displayed on mouse movement.
<event_mask> is an ORed combination of
1 for right button up,
2 for right button down,
4 for left button up and
8 for left button down events,<cursor_type> is either
0 for no cursor, or
1 for a full screen cursor, or
2 for a small cross cursor, or
3 for an underline blinking cursor.<cursor_color> is for selecting the color of the cursor (effect on 9845C only). Use
0 for White
1 for Cyan
2 for Magenta
3 for Blue
4 for Yellow
5 for Green
6 for Red and
7 for Black.Set <vsync> to 1 if the interrupt service routine should wait for vertical retrace before redrawing the cursor, otherwise set <vsync> to 0 (which is the recommended value unless you discover cursor flicker during move). All hardware cursors require graphics mode enabled (GRAPHICS command).
Mouse_get(<event>, <lbutton>, <rbutton>, <xpos>, <ypos>)
Retrieves the current mouse state, including the latest events delivered from the system-level interrupt service routine to the BASIC user program (as logically or'ed combination of the events mentioned above), the current state of the mouse buttons and the current absolute position of the pointer (independent whether the cursor is visible or not). <lbutton> and <rbutton> are returned as 1 for button down and 0 for button up. <xpos> is in the range between 0 and 559, <ypos> in the range of 0 to 454. Origin is the upper left screen corner.
Note that the button up/down event(s) which originally caused the notification and which are documented in <event> are not necessarily identical with the current state of the mouse buttons.
Mouse_off
Initiates a shut-down of the mouse driver*.
*Note that mouse driver shutdown actually has to be performed from within the system-level interrupt service routine (ISR), so it can require to make a short mouse move or click after calling the Mouse_off routine in order to definitly terminate the driver. Otherwise, an Error 193 can be the result of an IDELETE statement because there is still an active handler which can't be deleted.
All routines are used inside a BASIC program with a preceeding ICALL statement. The implementation is quite generic and should work in any 9845 system. It has been tested on 9845B with standard graphics option and 9845C models.
Generally, there are two types of use. Once the mouse driver is installed, the mouse state can either be interrogated in regular intervals (polling) by calling the Mouse_get() routine, or a mouse events can be directed to a special BASIC routine (which then calls the Mouse_get() routine). For most cases, the latter option is the better solution, since mouse events can be immediately handled.
An appropriate BASIC event handler can easily be implemented with
ICOM 1000
INTEGER Event,Lbutton,RButton,Xpos,Ypos
ILOAD "MSDRV" ! Load mouse driver assembly module
Sc=10 ! Select code for serial interface
ICALL Mouse_on(Sc) ! Install mouse driver
ON INT #Sc GOSUB Mouse_handler ! Define mouse notification handler
ICALL Mouse_set(8+2,2,0,0) ! Enable notifications on left & right button down
...
Event_loop: GOTO Event_loop
...
Mouse_handler: ! Notification handler for mouse events
ICALL Mouse_get(Event,Lbutton,Rbutton,Xpos,Ypos)
... do something with the data ...
RETURN
where Sc is the select code of the serial interface. In order not to disturb the user program, some critical operations (especially DMA transfers) must not be interrupted, so there has to be a way to disable the generation of mouse initiated interrupts. The general procedure for quickly disabling and re-enabling interrupts generated from serial input data is via the statements
WAIT WRITE Sc,5;0 (for disabling serial interrupts)
... do some critical procedures in between ...
WAIT WRITE Sc,5;132 (for re-enabling serial interrupts)
where Sc is again the select code of the serial interface. These commands should always be used for disabling interrupts during graphics draw operations (which normally are using DMA transfers). Note that for the WAIT WRITE statement, the I/O Option ROMs are required.
As a conclusion, the mouse driver works fine with the 9845 architecture, and it's too bad a mouse wasn't available at the design time of the system.
Tailoring HP 9845 Programs for Mouse Use
Using the mouse functions in existing HP 9845 BASIC programs needs some code modifications. HP 9845 BASIC already includes several ways to input cursor data. The devices supported are arrow keys, digitizer tablets, plotters and the light pen. Since HP 9845 BASIC uses a unified approach for handling graphics input, the way standard input devices are being set up and queried are in general the same for all devices:
- The desired device is selected for input with a GRAPHICS INPUT IS statement,
- the drawing areas are defined with clipping statements, such as LIMIT and CLIP,
- the measurement units are defined with scaling statements, such as LOCATE, SCALE, MSCALE and SHOW, plus selection of the unit mode with SETGU and SETUU,
- end-of-line interrupts may be defined for handling button press events generated by the input device with the ON GKEY statement,
- cursor tracking is specified as desired with the TRACK IS ON statement, and
- the cursor position and type is specified with a POINTER statement.
Note that for normal graphics operation, not all of the above steps have to be necessarily performed.
Once the input device is configured, cursor input can be queried any time with the CURSOR or DIGITIZE statements. Also, input can be selectively enabled and disabled with the GRAPHICS INPUT IS ON and GRAPHICS INPUT IS OFF statements.
The mouse driver doesn't use the unified graphics model, but instead operates independently and on pixel units. If you plan to modify an existing HP 9845 BASIC program for using the mouse instead of one of the standard input devices, you will have to change the statements mentioned above in the following way:
GRAPHICS INPUT IS <input device>
Comment out all occurences of this statement. Instead, add the following code at the beginning of the program:
ICOM 1000
INTEGER Event,Lbutton,RButton,Xpos,Ypos
Sc=10 ! Select code for serial interface
Xoffset=0 ! Horizontal offset of plotting area in GDUs
Yoffset=0 ! Vertical offset of plotting area in GDUs
Xscale=123/560 ! Horizontal pixel-to-unit ratio
Yscale=100/455 ! Vertical pixel-to-unit ratio
ILOAD "MSDRV" ! Load mouse driver assembly module
ICALL Mouse_on(Sc) ! Install mouse driver
ICALL Mouse_set(8+2,2,0,0) ! Enable notifications on left & right button down
LIMIT, CLIP and UNCLIP
Leave those statements as is (no change).
After setting the clip areas, store the new coordinates of the lower left screen corner (default 0,0) into the variables Xoffset and Yoffset after every change of the clipping areas. You will need this information later to recover the 9845 graphics pointer coordinates from the pixel data returned by the Mouse_get() routine. Also change the sign of the Xscale and/or Yscale variable if the coordinate system gets mirrored (i.e. Xmin > Xmax or Ymin > Ymax when using LIMIT).
LOCATE, SCALE, MSCALE and SHOW
Leave those statements as is (no change).
After setting the scale, store the resulting pixel-to-unit ratios (=units per pixel) into the variables Xscale and Yscale. You will need this information later to recover the 9845 graphics pointer coordinates from the pixel data returned by the Mouse_get() routine. Default plotting range for the CRT graphics is 123 units in X direction and 100 units in Y direction. So default value for Xscale and Yscale is 123/560 = 100/455 ~ 0.22. If the new coordinate of the lower left screen corner differs from 0,0, also adjust Xoffset and Yoffset to the new values.
ON GKEY [<priority>,] <statement>
Comment out all occurences of this statement and replace by the following statement:
ON INT #Sc [<priority>,]<statement>
OFF GKEY
Comment out all occurences of this statement and replace by the following statement:
OFF INT #Sc <statement>
TRACK <select code> IS ON
Leave those statements as is or comment them out (they have no relevance for the mouse driver but may slow down overall processing).
POINTER <x>, <y>[, <type>[, <color>]]
Leave those statements as is or comment them out (they have no relevance for the mouse driver).
CURSOR <x>, <y>[, <device string>]
Comment out all occurences of this statement. Instead use the following code:
ICALL Mouse_get(Event,Lbutton,Rbutton,Xpos,Ypos)
<x>=Xpos*Xscale-Xoffset
<y>=Ypos*Yscale-Yoffset
If <device_string> is going to be processed after the CURSOR statement, create the string according to the device which has been addressed manually. Here are examples for setting up the string for a replacement of the arrow keys, the light pen or the 9111A tablet (assuming cursor position is always within clipping limits):
! Arrow keys (button is never down)
<device string>="0,2,0"! Light pen
<device string>="0,2,0,1,1"
<device string>[1;1]=VAL$(Lbutton)! 9111A tablet
<device string>="0,2,0,00,00,0020,0"
<device string>[1;1]=VAL$(Lbutton)
DIGITIZE <x>, <y>[, <device string>]
Comment out all occurences of this statement. Instead use the following code:
Loop: !
ICALL Mouse_get(Event,Lbutton,Rbutton,Xpos,Ypos)
IF NOT Event THEN Loop
<x>=Xpos*Xscale-Xoffset
<y>=Ypos*Yscale-Yoffset
See the CURSOR statement above for how to handle the <device string>.
GRAPHICS INPUT <input device> IS OFF
Comment out all occurences of this statement (they have no relevance for the mouse driver). Instead use the following statement to disable mouse input:
WAIT WRITE Sc,5;0
It is always a good idea to disable mouse interrupts during graphics draw operations (especially on standard graphics), since mouse interrupts may disturb the data transfer between the mainframe and the graphics subsystem.
GRAPHICS INPUT <input device> IS ON
Comment out all occurences of this statement (they have no relevance for the mouse driver). Instead use the following statement to re-enable mouse input:
WAIT WRITE Sc,5;132
A Sample Mouser Driver Graphics Demo Application
As an example how to use the mouse driver, some keyboard events and, in addition, how to utilize many of the graphics features of a 9845B/C, I've written a small drawing program which uses both mouse and keyboard control, quite similar to common painting programs. The program is also pretty useful for loading, editing, printing and saving binary graphics data on a 9845 system.
The whole demo program is not only a good application for showing the 9845 mouse feature, but it is also a nice tutorial on several graphics techniques like how to determine the installed graphics hardware, how to use graphics commands, how to print, load or save graphics data, how to use the powerful MAT PLOT feature, and how to implement "pop up windows" or help screens without destroying the graphics content.
Note that there are two versions of the program depending on the firmware you have installed in your system, one for standard graphics ROM and one for color/enhanced graphics ROM. Reason behing is that the color/enhanced graphics ROM provides a couple of commands which are not available in the standard graphics firmware.
The content of the mouse driver image includes the following files:
| MSDRV.ASMB | Machine language driver module, to be loaded with an ILOAD command (Assembler ROM required) |
| MSDRV_.DATA | Mouse driver assembler source program in text format, to be loaded with a GET command (Assembler ROM required) |
| COLOR.PROG | Mouser driver demo draw program for enhanced and color graphics, to be loaded with a LOAD command (color/enhanced graphics ROM required) |
| COLOR_.DATA | Same as above but in text format, to be loaded with a GET command (actually safe to be run on a standard graphics system since all unsupported commands will automatically be outcommented during the GET process - in contrast to the COLOR.PROG above) |
| MONO.PROG | Mouser driver demo draw program for standard monochrome graphics, to be loaded with a LOAD command (works with any graphics firmware but won't support color or polygons, all color/enhanced graphics commands are outcommented) |
| MONO_.DATA | Same as above but in text format, to be loaded with a GET command |
| 9845.BDAT | Sample bitmap file for standard monochrome graphics |
| SAMPL1.BDAT | Sample bitmap file for color graphics (part1), bitmap can be loaded within the mouse driver demo draw program, simply issue "SAMPL" when asked for a filename |
| SAMPL2.BDAT | Sample bitmap file for color graphics (part2), loaded automatically after the first part |
| SAMPL3.BDAT | Sample bitmap file for color graphics (part3), loaded automatically after the second part |
The demo provides a canvas which can be freely drawn or filled with lines, rectangular frames, solid rectangles and solid polygons. Arbitrary text labels can be input with the keyboard. Line and fill type and color can be selected as well as the cursor type. Objects can be either drawn or erased. The whole artwork can be sent to the internal printer or saved/loaded to/from mass storage at any time (of course in an uncompressed format...). Note that color primarily refers to the 9845C, however <k8> is used to activate the (single) color on monochrome displays whereas SHIFT+<k8> selects the erase mode.
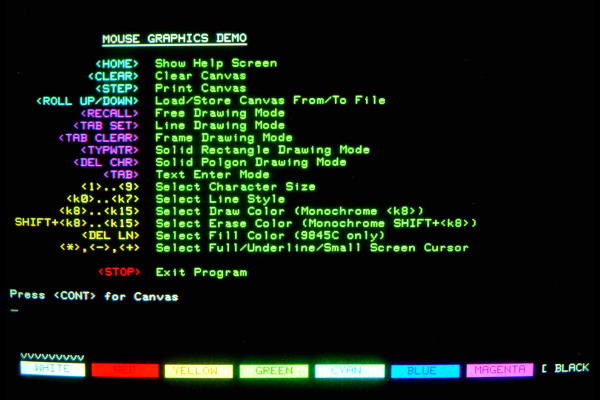
Mouse Graphics Demo Help Screen on a 9845C
Lines are always drawn from the last position to the position where the next left mouse button click points to. If you need to set a new starting point, click to the position of this new starting point with the right mouse button.
When using the text drawing feature, simply hit the <TAB> key, then klick at the position where the text should be drawn, and finish the text with <CONT>. Different character sizes can be selected before with the keys "1" for smallest size up to "9" for largest size.
Due to the limited graphics perfomance of the 9845B and the lack of a hardware erase function on the 9845C, there is no eraser, however both a selected area and the the whole screen can be cleared. Finally, there is a special help screen with a summary of the used function keys which can be activated with the <HOME> key.
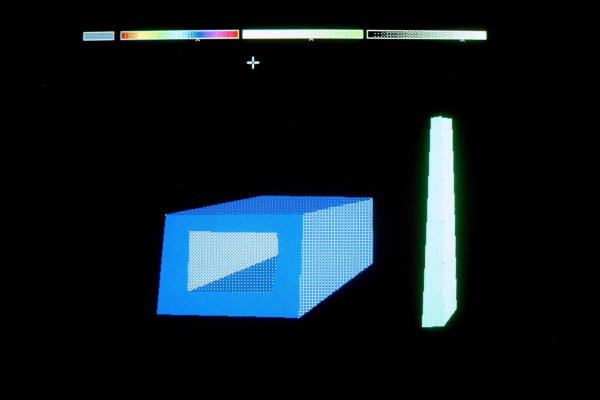
Simple 3D Scene modelled in the Mouse Demo Polygon Mode (with Color Palette on)
Within the canvas, color selection on a 9845C (or monochrome shades for enhanced graphics) for draw operations can be performed also with the softkeys and fill operations with a color palette (press <DEL LN> to show/hide palette). Once the palette is visible, you can chose the appropriate fill color shade by cklicking in the three selectors, one for hue, one for saturation and one for luminance. Every selection is previewed in a color selection field as the leftmost element of the palette. Click into the color selection field to chose the current color shade as "AREA COLOR" for subsequent fill operations, or press <DEL LN> again to cancel the selection.
The palette is also an example for how to 'pop up' controls without destroying the underlying image. During program initialization, the palette is drawn on a hidden canvas, then this canvas is copied with GSTORE into an integer array. Each time the palette is shown, first the overlapping part of the current image is saved with GSTORE into a temporary buffer, then the palette array is made visible with a GLOAD operation on the palette array. Once the selection has been made, the original image is restored with a GLOAD on the temporary buffer. This works fast enough to show immediate response.

Mouse Demo Fill Color Selection with HSL-Palette
The save and load feature for graphics supports both fast saves (BDAT files) and standard saves (DATA files). 'Fast saves' consumes only half the disk space and work five times as fast as the 'standard save', therefore this is the recommended way. However, fast saves are only possible on disk media, so if you want to save to tapes, you'll have to use the standard save function.
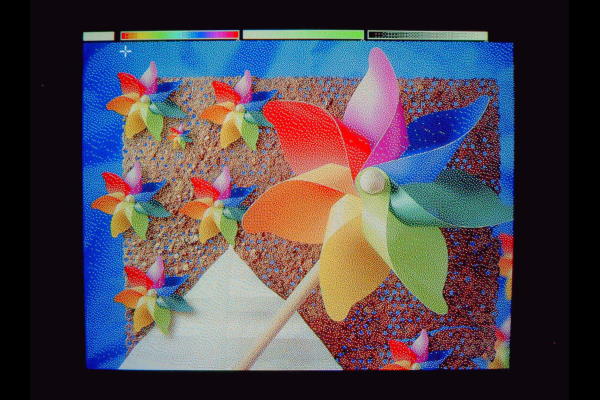
Color Bitmap loaded within the Mouse Graphics Demo on a 9845C
Once saved and transferred to PC, both file types can be converted to standard Windows BMP bitmap files with the Bmpconvert program from the 9845 Utilities Project. Also, a standard BMP file can be converted to either a BDAT or DATA file, transferred to the 9845 and then loaded with the MSDEMO program. The above screen shot is an impressive example on how far the capabilities of the 9845C color system go. It has been produced by simply converting a standard Windows bitmap into the 9845C save format, which is then loaded in the mouse demo application. See the 9845C demo screen dump gallery for some more examples.
Since the 9845C is capable of displaying up to eight primary colors, dithering with a special color palette is necessary before applying Bmpconvert on the BMP image (Bmpconvert can do a color reduction, but no dithering). The 8 entry color palette needed for dithering with a conventional image editor like Photoshop should hold the eight primary colors black, blue, cyan, green, yellow, red, magenta, and white.
Note that color graphics will be saved into three parts of approximately the same size. See the Tutorial on Using Bitmaps for more information.
Solid polygons are drawn using the 'MAT PLOT' feature, which is available for enhanced and color graphics only. Circles, as well as "rubber bands" are not used in the demo program.
Have fun and send me some of your favorite creations. Here is a first try (note the mouse cursor at the upper right corner...):
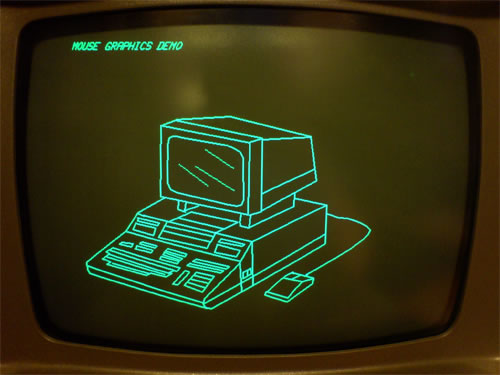
Monochrome Example on a 9845B: Something is different...
Downloads
Click here for downloading an hpi image file with MS mouse driver and mouse graphics demo, as well as the program listings:
| Image with mouse driver and demo application: | 9845-mouse-driver-hpi.zip |
| Mouse driver and demo application listings: | 9845-mouse-driver-listings.zip |